2 R packages
openstatsware short course: Good Software Engineering Practice for R Packages
August 24, 2025
Disclaimer
Any opinions expressed in this presentation and on the following slides are solely those of the presenter and not necessarily those of their employers.
Introduction
What you know already
- Packages provide a mechanism for loading optional code, data, and documentation
- A library is a directory into which packages are installed
install.packages()is used to install packages into the librarylibrary()is used to load and attach packages from the library- “Attach” means that the package is put in your
searchlist — objects in the package can be used directly
- “Attach” means that the package is put in your
- Remember that package \(\neq\) library
What we want to talk about now
- How to write, build, test, and check your own package 😊
- How to do this in a methodical and sustainable way
- Give tips and tricks based on practical experience
Contents of a package
How is a package structured?
Package source = directory with files and subdirectories
- Mandatory:
- DESCRIPTION
- NAMESPACE
- R
- man
- Typically also includes:
- data
- inst
- src
- tests
- vignettes
- NEWS
How to get started quickly
Once upon a time, developers would set up this structure manually 🥱
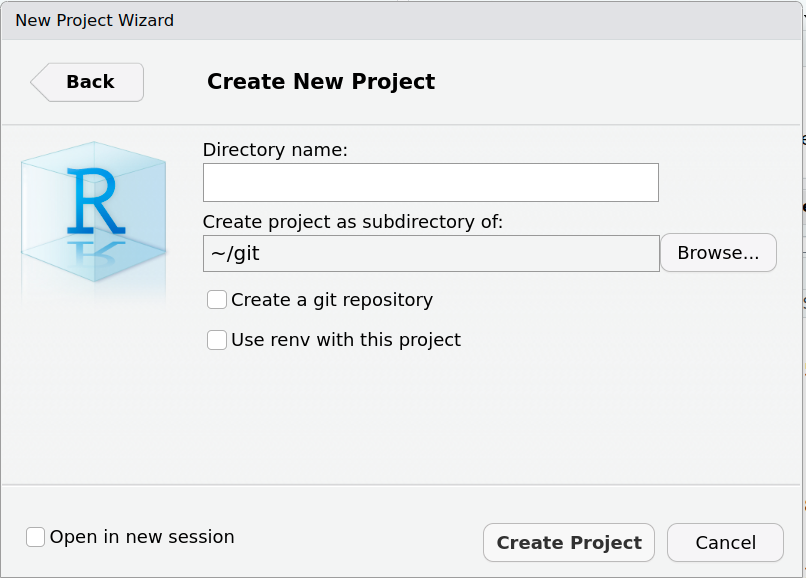
Nowadays, it’s super fast with:
usethis::create_package()- RStudio > File > New Project > New Directory > R Package
DESCRIPTION file
- Package: Choose the name of your package
- Not unimportant!
- Check CRAN to see if your name is available
- Title: Add a Title for Your Package (Title Case)
- Version: Start with a low package version
Major.Minor.Patchsyntax (Semantic Versioning)
- Authors@R: Add authors and maintainer
- Description: Like an abstract, including references
DESCRIPTION file (cont’d)
- License: Important for open sourcing
- Consider permissive licenses such as Apache and MIT
- Depends:
- Which R version users need to have at a minimum
- Ideally don’t put any package here
- Packages will be loaded and attached upon
libraryyour package
- Imports: Packages which you import functions, methods, classes from
- Suggests: Packages for documentation processing (
roxygen2), running examples, tests (testthat), vignettes
R folder
- Only contains R code files (recommended to use
.Rsuffix)- Can create a file with
usethis::use_r("filename")
- Can create a file with
- Assigns R objects, i.e. mostly functions, but could also be constant variables, data sets, etc.
- Should not have any side effects, i.e. avoid
require(),options()etc. - If certain code needs to be sourced first, use on top of file (which will update the
Collatefield ofDESCRIPTIONautomatically)
NAMESPACE file
- Defines the namespace of the package, to work with R’s namespace management system
- Namespace directives in this file allow to specify:
- Which objects are exported to users and other packages
- Which are imported from other packages
NAMESPACE file (cont’d)
- Controls the search strategy for variables:
- Local (in the function body etc.)
- Package namespace
- Imports
- Base namespace
- Normal
search()path
man folder
- Contains documentation files for the objects in the package in the
.Rdformat- The syntax is a bit similar to
LaTeX
- The syntax is a bit similar to
- All user level objects should be documented
- Internal objects don’t need to be documented — but I recommend it!
- Once upon a time, developers would set up these
.Rdfiles and theNAMESPACEmanually 🥱 - Fortunately, nowadays we have
roxygen2! 🚀
roxygen2 to the rescue!
- We can include the documentation source directly in the R script on top of the objects we are documenting
- Syntax is composed of special comments
#'and special macros preceded with@ - In RStudio, running Build > More > Document will render the
.Rdfiles and theNAMESPACEfile for you - Get started with
usethis::use_roxygen_md() - Placing your cursor inside a function in RStudio, create a
roxygen2skeleton with Code > Insert Roxygen Skeleton
Setting up roxygen2 in your project
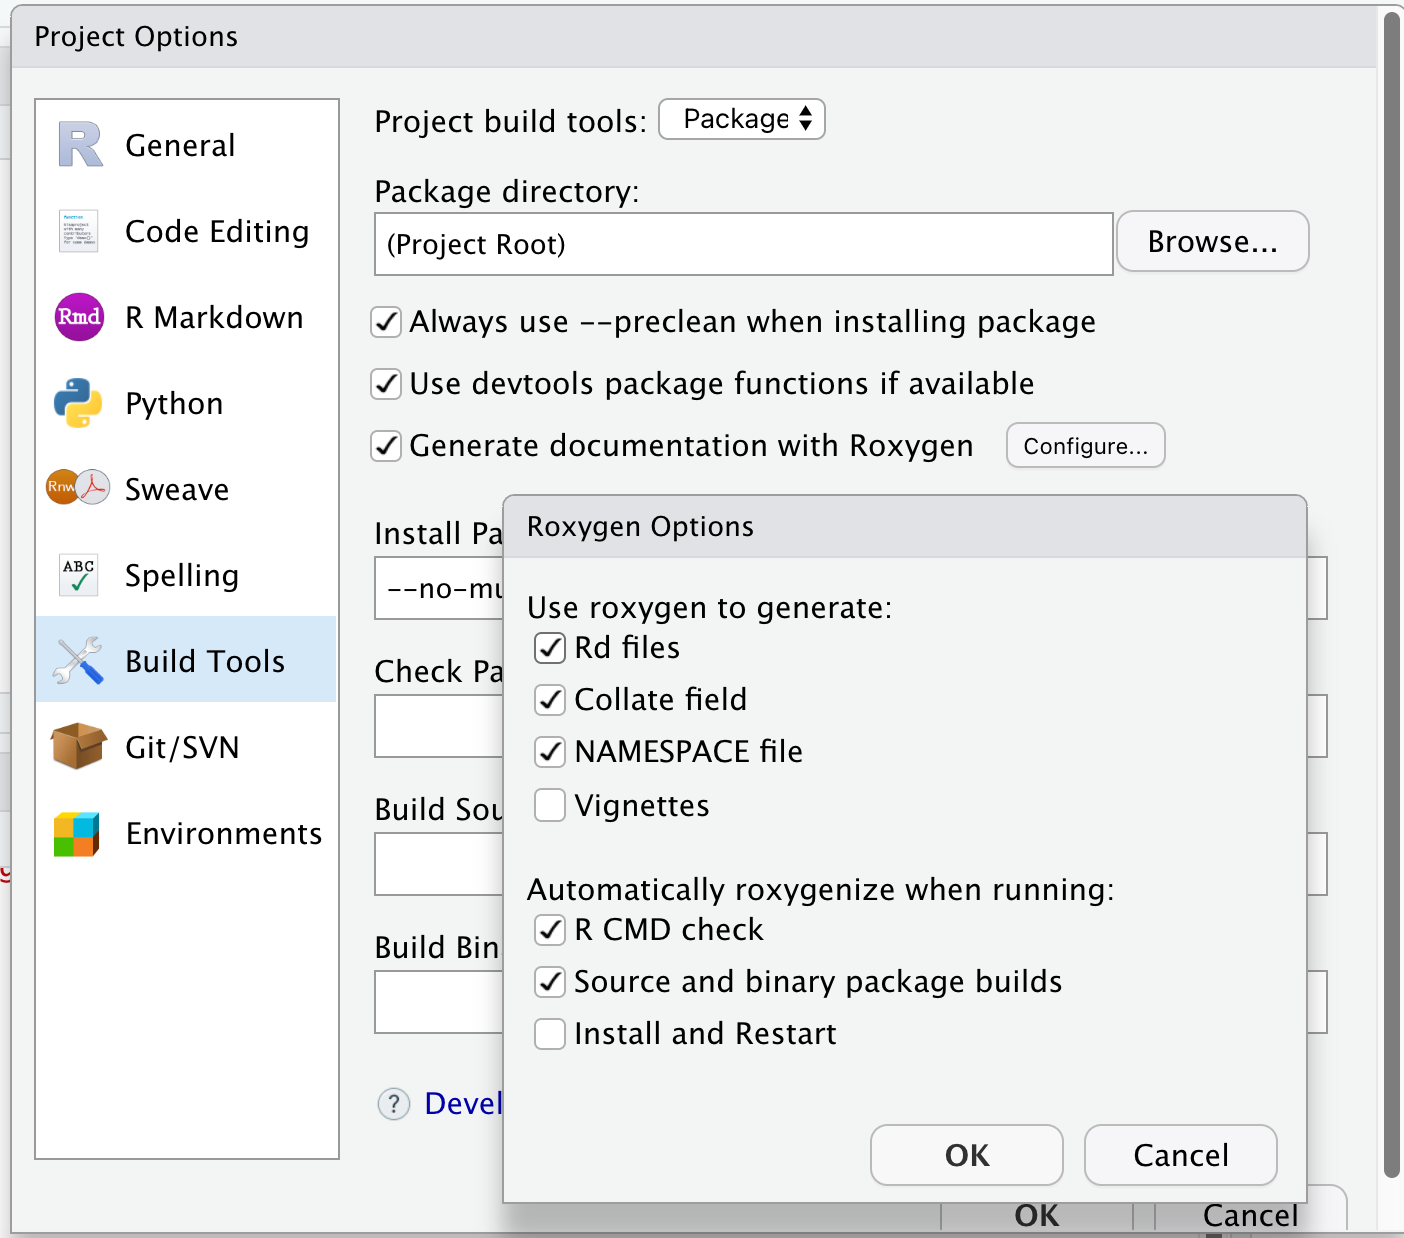
roxygen2 source
R/my_sum.R:
#' My Summation Function
#'
#' This is my first function and it sums two numbers.
#'
#' @param x first summand.
#' @param y second summand.
#'
#' @return The sum of `x` and `y`.
#' @export
#'
#' @note This function is a bit boring but that is ok.
#' @seealso [Arithmetic] for an easier way.
#'
#' @examples
#' my_sum(1, 2)
my_sum <- function(x, y) {
    x + y
}
roxygen2 output
man/my_sum.Rd:
% Generated by roxygen2: do not edit by hand
% Please edit documentation in R/my_sum.R
\name{my_sum}
\alias{my_sum}
\title{My Summation Function}
\usage{
my_sum(x, y)
}
\arguments{
\item{x}{first summand.}

\item{y}{second summand.}
}
\value{
The sum of \code{x} and \code{y}.
}
\description{
This is my first function and it sums two numbers.
}
\note{
This function is a bit boring but that is ok.
}
\examples{
my_sum(1, 2)
}
\seealso{
\link{Arithmetic} for an easier way.
}
roxygen2 output (cont’d)
NAMESPACE:
tests folder
- Where store the unit tests covering the functionality of the package
- Get started with
usethis::use_testthat()andusethis::use_test()and populatetests/testthatfolder with unit tests - Rarely, tests cannot be run within
testthatframework, then these can go into R scripts directly intestsdirectory - We will look at unit tests in detail later
data folder
- For (example) data that you ship in your package to the user
- Get started with
usethis::use_data() - Note: Usually we use lazy data loading, therefore no
data()call needed before using the data
- Get started with
- If you generate the example data, save the R script, too
- Put that into
data-rawfolder, start withusethis::use_data_raw()
- Put that into
inst folder
- Contents will be copied recursively to installation directory
- Be careful not to interfere with standard folder names
- For data that is used by functions in the package itself
- Those would typically go into
inst/extdatafolder - Load with
system.file("path/file", package = "mypackage")
- Those would typically go into
CITATION: For customcitation()output- Create it with
usethis::use_citation()
- Create it with
inst/doccan contain documentation files (typicallypdf)
src folder
- Contains sources and headers for any code that needs compilation
- Should only contain a single language here
- Because R uses it, mixing
C,C++andFortranusually works with OS native compilers
- Because R uses it, mixing
- Much more complex to write and maintain than an R only package
- Typically only makes sense for
- Wrapping existing libraries for use in R
- Speeding up complex or long computations
vignettes folder
- Special case of documentation files (
pdforhtml) created by compiling source files - Package users don’t need to recompile the vignettes - they are delivered with the package
- Start a new vignette with
usethis::use_vignette()- Starts an
Rmdvignette, compiled withknitr
- Starts an
- Important for the user to understand the high-level ideas
- Complements function-level documentation from our
roxygen2chunks
NEWS file
- Lists user-visible changes worth mentioning
- In each new release, add items at the top under the version they refer to
- Don’t discard old items: leave them in the file after the newer items
- Start one with
usethis::use_news_md()
Licensing
Licensing
- We mentioned before that licensing information is usually included in the
DESCRIPTIONfile - In fact, the
Licensefield (in standardized form) is mandatory - Licensing for a package which might be distributed is an important but potentially complex subject
- It is very important to include licensing information, as otherwise:
- It may not be possible to use it
- It may not be possible to distribute copies of it
- We are going to talk more about licensing in Chapter 5 later today
License options
Common licenses for R packages: GPL-2, GPL-3, AGPL-3, MIT, …
Details and description of most licenses are available online:
Examples of standardized license specifications:
License: GPL-2
License: LGPL (>= 2.0, < 3) | Mozilla Public License
License: GPL-2 | file LICENCE
License: Artistic-2.0 | AGPL-3 + file LICENSE- The optional file
LICENSE/LICENCEcontains a copy of the license- Only include such a file if it is referred to in the
Licensefield
- Only include such a file if it is referred to in the
Adding a license to your package
Once again, functions from the
usethispackage simplify this process:usethis::use_mit_license()usethis::use_gpl_license()usethis::use_agpl_license()usethis::use_lgpl_license()usethis::use_apache_license()usethis::use_cc0_license()usethis::use_ccby_license()usethis::use_proprietary_license()
Building the package
Documenting the package
- The first step is to produce the documentation files and
NAMESPACE - In RStudio: Build > More > Document
- In the console:
devtools::document()
Checking the package
- R comes with pre-defined check command for packages: “the R package checker” aka
R CMD check - About 22 checks are run (so quite a lot), including things like:
- Can the package be installed?
- Is the code syntax ok?
- Is the documentation complete?
- Do tests run successfully?
- Do examples run successfully?
- In RStudio: Build > Check
- In the console:
devtools::check()
Building the package
- The R package folder can be compressed into a single package file
- Typically we manually only build “source” package
- In RStudio: Build > More > Build Source Package
- In the console:
devtools::build()
- Makes it easy to share the package with others and submit to CRAN
Installing the package
- R comes with pre-defined install command for packages:
R CMD INSTALL - In RStudio: Build > Install
- In the console:
devtools::install() - Note: During development it’s usually sufficient to use Build > More > Load All
- Runs
devtools::load_all() - Roughly simulates what happens when package would be installed and loaded
- Unexported objects and helpers under
testswill also be available - Key: much faster!
- Runs
Keyboard shortcuts
- Learning some of the RStudio keyboard shortcuts can speed up many of the tasks we introduced in this lecture:
| Description | Windows & Linux | Mac |
|---|---|---|
| Install and Restart | Ctrl+Shift+B | Shift+Command+B |
| Load All | Ctrl+Shift+L | Shift+Command+L |
| Test Package | Ctrl+Shift+T | Shift+Command+T |
| Check Package | Ctrl+Shift+E | Shift+Command+E |
| Document Package | Ctrl+Shift+D | Shift+Command+D |
- There are many more – check for instance the RStudio IDE Documentation
Exercise
Let’s try this out now 😊
- Set up a new R package with a fancy name
- Fill out the
DESCRIPTIONfile - Include a few functions
- Add
roxygen2documentation - Pick and add a license to the package
- Export the function to the namespace
- Produce the package documentation
- Run checks
- Build the package
\(\leadsto\) We will be using this package throughout the day!
References
License information
In the current version, changes were done by (later authors): Liming Li , Philippe Boileau , Alessandro Gasparini
This work is licensed under the Creative Commons Attribution-ShareAlike 4.0 International License.
The source files are hosted at github.com/openstatsware/shortcourse-iscb2025, which is forked from the original version at github.com/RCONIS/workshop-r-swe-zrh.
Important: to use this work you must provide the name of the creators (initial authors), a link to the material, a link to the license, and indicate if changes were made.